Outlook 2003 to SharePoint 2007 Email Integration

So what has Andy been working on lately? Well, lately I’ve been writing an integration between Outlook 2003 and SharePoint 2007. It was all a bit fraught – some of the web services I was using are a bit dodgy, uploading files and metadata as one transaction doesn’t seem to be possible, and everyone always underestimates the effort involved in coping with the metadata about an email. I’ve written an integration between GroupWise 6.5 and Open Text Livelink before now, and again, dealing with the metadata was a bigger effort than browsing the system or uploading the document.

Now, email saving into SharePoint seems to be an overlooked thing. Microsoft have their Exchange 2007 Managed Folders, which can push emails into a SharePoint Records center. Liam Cleary has written his usual high-quality description of setting it up, and the MS Records management team blogged about it in parts I, II, III and IV.

However, a lot of our customers aren’t impressed with this solution. They want to be able to save emails into particular SharePoint Libraries within their usual collaboration environment, rather than just booting them off into a Record Center.

U2U built an Outlook 2007 addin which is very nice – though a bit of a different take. Their approach requires defining the save location up front and mapping to the data, but that then saving emails is dead easy – just drag them into the folder. Nice.

Anyway, this is what I built – I’ll contrast with the U2U offering lateer…

Continue reading “Outlook 2003 to SharePoint 2007 Email Integration”

Outlook 2003 to SharePoint 2007 Email Integration

Are SharePoint Breadcrumbs completely wrong?

I upgraded the version of WordPress I’m running recently and I enabled statistics on the blog. It’s been a bit of an eye-opener. My posts on ‘What the heck is going on with SharePoint Breadcrumbs‘ and ‘More SharePoint Breadcrumbs WTF‘ have together more hits that any of my other articles, and both are visited about evenly.

This is pretty interesting. Breadcrumbs should be pretty simple. I mean, we all use them on the web, probably every day, and often without noticing. So how come people are clearly looking up information about SharePoint breadcrumbs? Clearly something is wrong with them.

So this set me thinking – what’s wrong with them? And here’s what I could think of:

  • There are two breadcrumbs. You’ve got the Global breadcrumb, and then the PlaceholderTitle breadcrumb. Seriously, how many websites do you come across that have two?
    Image showing the Global and Title Breadcrumbs
  • ‘Site’ levels of the hierarchy can appear in one or the other breadcrumb. Depending on whether or not your navigation inherits it’s navigation from it’s parent site, the ‘Site’ links can appear in the global or title breadcrumbs. Thus, there’s no consistency as to where a site appears – if it appears at all! I can see why it’s been built this way – essentially it allows us to ‘skip’ levels in the site hierarchy as shown on the global breadcrumb, and it shortens the title breadcrumb. I wonder if this wouldn’t be better facilitated by a ‘show in Global breadcrumb’ site setting. Or just show all sites in the path to the site?
  • Why is what is shown in the breadcrumbs tied to what is shown in the site’s top navigation? That’s just confusing.
  • Having some breadcrumbs in the Page Layout (i.e. in the main content area) and others coming from the master page is just plain confusing.

I don’t quite know what the answer to this is; after all, we need a way to navigate back up the site hierarchy, though we might not always want to allow that. And breadcrumbs could get very long, so yes, maybe we want to skip levels. But I think I’d be tempted by showing all sites in the Global navigation. This would also divorce the breadcrumb from the top navigation settings, and I think would be easier.

And if the Global navigation gets too long? Well, that seems quite possible. In that case, how about a setting on each site to ‘Display in Menu in the Breadcrumb’ to give something like this:

Concept of single breadcrumb using drop down menus

This way you can still have your ‘Main’ sites in the hierarchy, but all levels are still available. Of course, you might want to make it that all the subsites of last ‘Main’ site are always visible irrespective of that setting. I think that would work, and would require less getting used to.

It’s a bit like the Vista breadcrumb in Windows Explorer – but a bit different, which might count against it…

The breadcrumb in Windows Explorer in Vista

That said, I’m open to thoughts from others! Comment if you’ve got an idea of how breadcrumbs should work!

Are SharePoint Breadcrumbs completely wrong?

Styles in the Summary Links Web Part

So, I’d been asked to look at building a links menus something like this:

A Fake Menu with Big Buttons

I thought that this was quite nice. I wondered if I could make something similar to this using the Summary Links web part – curiously, it’s something I’ve never really used, and I though I remembered seeing that it could show images too. So, I set up some examples… Continue reading “Styles in the Summary Links Web Part”

Styles in the Summary Links Web Part

Accessibility in MOSS…

Recently I had a meeting with HiSoftware about the Accessibility Kit for SharePoint that they’ve made (and is available on CodePlex), and it was quite interesting. Making a SharePoint system accessible requires knowing how much of the system to make accessible, and to what level of accessibility. As with branding, doing the whole system would probably be prohibitively expensive. However, making certain areas (such as a WCM site) accessible is quite feasible.

Even if a SharePoint system is developed to be accessible, there is a governance issue in make sure that new content is also accessible. HiSoftware provide the Accessibility Kit (for free) to help develop an accessible site – though custom work will always be required. They also provide several commercial products to facilitate governance of new content and ensuring that it is accessible. I think that these will be useful sometimes, so it’s not a bad sales pitch. Continue reading “Accessibility in MOSS…”

Accessibility in MOSS…

Document Conversion Service and Images

It’s worth noting, the document conversion service doesn’t convert embedded images – which is a pain (and why? They’re available as image files inside the .docx file! Come on Microsoft, that’s craaaazy!)

Instead, you have to insert them as linked objects :

Objects such as images that you add to your Word 2007 document will not appear on the converted Web page if they are embedded in the document. To add these objects so that they appear on the converted Web page, first upload these objects to a document library and then insert them as linked objects (from this location) rather than embedded objects in your document.

There are some instructions here, but this is my guide:

First, find your image on your web page. In SharePoint, this might be a Picture Gallery. Copy the image by Right Click > Copy

Go to Word, and Paste > Paste Special…

The Paste Special Menu

Select that you want HTML Format :

And congratulations, you’ve inserted a link to the image on the web server, rather than the image itself:

Document Conversion Service and Images

You can do a lot with page layouts…

I’ve been blogging a fair bit lately about Page Layouts – how they affect styles to hide bits of the page, how they are used to replace breadcrumbs and the like – but you can do a heck of a lot with them.

Quite a lot of your default master page is in ContentPlaceHolder controls. Those ContentPlaceHolder controls have default content – but your page layout can define Content controls which place content into those placeholders, overriding them. Of course, you still need to have all of the appropriate controls on a page – just removing the ‘Site Actions’ menu for everyone isn’t a good idea – but you can do a lot.

This sort of came up at the last SharePoint User Group meeting – Colin Byrne was demonstrating Silverlight in SharePoint (which apparently doesn’t work all that well yet, but shows promise). One of the demos he has showed replacing the left navigation with a Silverlight control, but used a neww Master Page do to that. I thought of a demo I’d done recently where I’d done similar – but with a Page Layout. I used this to replace the left navigation menu with a Web Part Zone:

Normal View

Page Extensively Modified by a Page Layout

Edit View

Page Extensively Modified by a Page Layout - Edit View

Believe it or not, this is actually the default master with a particular Page Layout that I made, and the ‘Simple’ theme applied. Actually, there are lots of bits of the page modified by the Page Layout. The ‘Site Actions’ menu and Top Navigation Bar have been moved up, for example. The Left navigation has been replaced by a Web Part Zone, and I’ve dropped a Content Query Web Part in there for a giggle. And the Search box has been moved down the page too.

You could do all of this with a Master Page of course – and in real life, you’d probably want to for most of those modifications. For some things, though, like replacing certain navigation controls (which is what some of the out-of-box page layouts do with title breadcrumbs) then I think that a page layout might be exactly what you want – so that you can have different forms of navigation for different pages using the same Master Page.

Anyway, I was surprised by how easy it was to do this. Given that the Master Page defines default content, much of what I did was just copy that default content into the Content control for the location that I wanted to put the control into – and voila!

You can do a lot with page layouts…

Pimp my SharePoint Part II – Beyond Just Colours

Previously I’ve written about branding in SharePoint and the technologies involved. However, there is more to branding than just the technologies used and the colours you want, which was what that post focussed on. Really, it’s more a question of style and content than just colour and pictures. This makes it all a good deal more complicated though, which emphasises the need for proper management of the work and for it to be treated as a proper project.

To recap on the technologies used in MOSS branding, briefly:

  • Master Pages – can change everything
  • Themes – can change the colour of elements and the background images.
  • Web Parts – can change the layouts of pages and some of the appearance.
  • Combination thereof.

The two main technologies discussed in branding are Master Pages and Themes, and a good description is:

[Themes are] Akin to painting a house new colors and changing the pictures on the walls. [Master Pages are] Akin to remodelling the whole house
Heather Solomon

Well, recent experience of branding and some interesting slides by Heather Solomon have driven home some other points. Note that these apply to MOSS but not WSS (which only has ‘basic’ pages). The ultra high level view of what I’ve learnt is:

  • Just saying ‘X days to do branding’ is not a good idea.
  • Branding encompasses more than I’d previously really thought about, both in a business and technology senses.
  • It’s more of a ‘Pick and Mix’ affair than ‘small, medium or large’
  • Specification and scope is vitally important.
  • Therefore, branding should be treated as a proper project in its own right, with requirements, specification, design and testing phases.

Continue reading “Pimp my SharePoint Part II – Beyond Just Colours”

Pimp my SharePoint Part II – Beyond Just Colours

Modify the RichHTMLField control on your page layouts

When building an intranet, it’s important to try to get consistent styling and formatting, especially if you want to be able to update this later. How do you do this?

To create Pages in SharePoint, you have two options really:

  • Create by hand though the site’s ‘Create Page’ function. Fill in and format your text using the Content Editor Control
  • Create the content in Word, InfoPath, etc., and convert to a Web page using the Document Conversion service.

I’ve been having a bit of a look at this:

Creating Pages through the Web interface

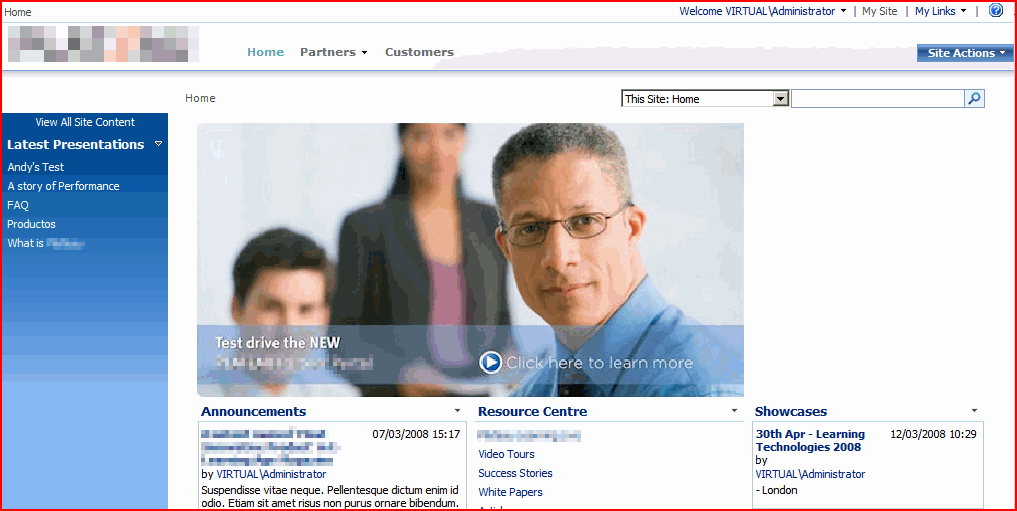
In the SharePoint site, create a new page. Depending on the layout, often they have a RichHTMLField control. In Edit mode, this displays a content editor:

Normal Content Editor Control

and when published, it just displays that content.

However, this control has a lot of options. Editors can adjust text fonts, sizes, colours, boldness – they can even get into the HTML and edit that! I quite like this, but it’s hardly conducive to having a consistent style. What would be good would be to have a number of pre-defined styles, and lock out the other control options.

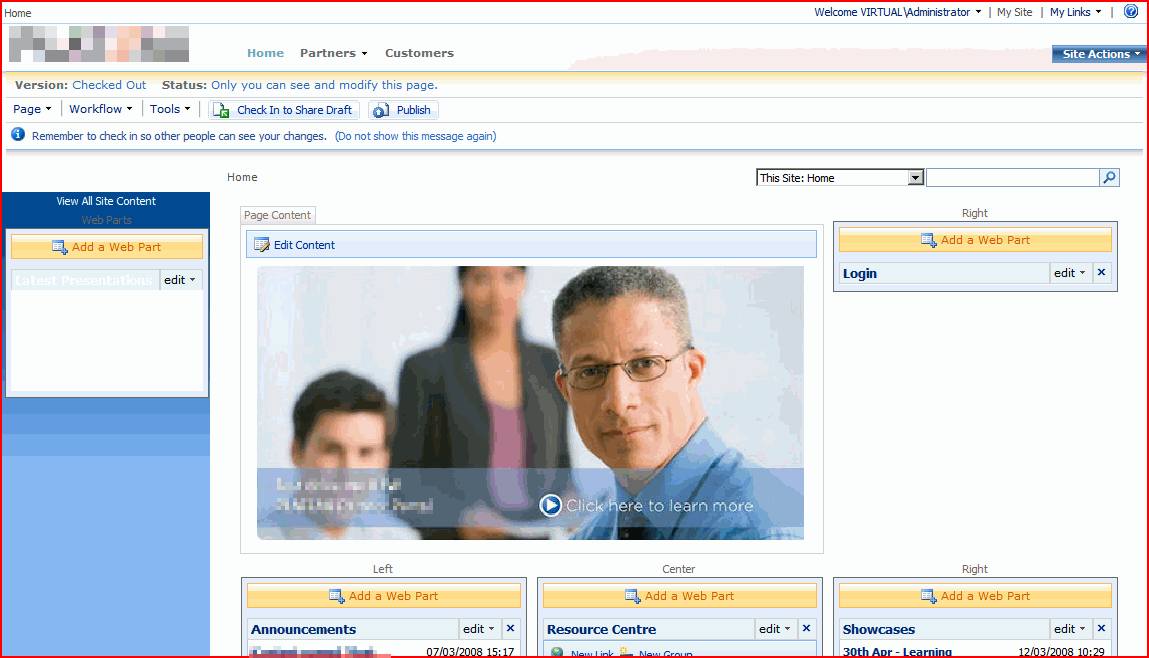
First, let’s look at removing those option buttons. It turns out that the RichHTMLField control has a number of properties you can set to disable these. This works nicely:

<PublishingWebControls:RichHtmlField id="content" FieldName="PublishingPageContent" runat="server" DisableBasicFormattingButtons="True" AllowTables="False" AllowHtmlSourceEditing="False" AllowLists="False" />

Results in:

Modified Content Editor Control

What I’ve not yet been able to figure out is how to disable the ‘standard html format’ menu thing (the paragraph sign ¶ ). I know that it’s for formatting the whole of a paragraph – but we have some problems with that, as we’ll see later. Anyway, now we’ve got those buttons disabled, user’s are MUCH more restricted in the styles that they use.

Second then, how do we define our own styles for the ‘Styles’ menu in the Content Editor? Well, this is a bit more complicated, but there is good documentation out there. Ari Bakker has some good instructions, there’s another (less consise) example from MartyG and there is good documentation on MSDN – though do not believe the top comment, I’ve had my styles working from another CSS file just fine. Do pay attention to the second comment – to see the styles in the menu, you will have to Select some text.

The steps as I found them ultimately were:

1) In your RichHTMLField set the PrefixStyleSheet=”someName”

2) In your styles (whichever one you fancy, as far as I can tell) set up your styles:

.someNameCustom-Heading1 {

...

}

.someNameCustom-Heading2{

...

}

3) Publish.

4) Make sure you’ve selected some text, then choose a style:

Editor Styles Menu

Just as a sidebar, there is a fairly good article on MSDN about “How to Create a SharePoint Server 2007 Custom Master Page and Page Layouts for a Web Content Management Site

Anyway what about the next option….

Creating Pages with the Document Conversions Service

First off, this requires that your servers are setup and running the service and your content types are configured set up for it. That’s not too surprising, and I’m not going to go into that any further. I’m also going to look solely at authoring from Word only, and not InfoPath or XML.

Now, things might get confusing here between CSS styles and Word Styles. For simplicity, from here on I’m going to refer to CSS styles with small s (styles) and Word Quick Styles with a big S and italics (Styles).

Once those are services are set up running, you face the same first problem as with the web page authoring – how do we stop users mucking around with our Styles and formatting, except that this time it’s in Word. Well, Word 2007 lets you do this. First, go to the Manage Styles Menu:

Manage Styles in Word

Then on the ‘Restrict’ tab, set the Styles you want to limit users too. This will password protect your template, so that others can’t just undo these settings. Then get users to create their pages using these Styles – they can’t create new Styles or modify the colour/boldness/formatting of the text directly..

Okay, so what happens to the Styles when we upload and convert the document. Well, that depends on the settings you configure for the conversion:

Styles Settings

You can either strip out the Styles from the document, or keep them. Okay, but what does that mean?

Well, Word has a number of ‘default’ Styles – normal, Heading 1, Heading 2, etc. – and there are style definitions of what they should look like in a stylesheet called ‘RCA.css’ (for Rich Client Authoring). In SharePoint Designer you’ll find this in ‘style library > en-us > core styles’ . This defines a the styles for a bunch of Styles
RCA Styles
Click on the image and take a look. You’ll notice that there are css styles for Heading1-P and Heading1-H – we’ll come back to why there are two of each style.

Anyway, returning to what happens to the Styles – if you decide to ‘Remove CSS <styles> section…’ you’ll get a page where your text is formatted as per the styles in RCA.css. This might be quite different to the Styles in your original Word document! Default Styles (Normal, Heading 1, etc.) will be defined by the CSS styles in RCA.css. If you have extra Styles beyond the ‘default’ ones in Word, then they will not have any style, as they don’t have any definition in the RCA.css file. For example, if I define a Styles in Word called ‘Heading 1 Red’, then my page will use css classes called Heading1Red-P and Heading1Red-H. However, in the RCA.css file, there is no definition for these classes, and hence they’ll be unformatted. You can add them though, or you can put them in another stylesheet, etc..

What if you choose to ‘Store CSS <styles>…’? Well, then the CSS definitions for the Styles get stored with the page, and the out-of-box page layouts put this content into the header – but after the RCA.css file has been referenced, so these styles take precedence. Thus, your document will be styled as defined in the document (well, more or less).

Great! Oh, wait, what if I want to change all of my Heading 1 styles and I’m storing the CSS in the page? Well, that’s a problem – ‘cos each page has it’s own definition. Because of that, I would suggest setting up templates with known Styles , locking them down, defining the css styles for those Styles in a CSS file (like rca.css), and then making sure your document conversion ‘Removes CSS‘. If you have gone down the route of having your styles stored with your page, you might be able to fix things by simply removing the FieldValue control that inserts the styles into the page – for the PageFromDocLayout that comes out-of-box, this control is the PageStylesField.

Anyway, you can see why I’m suggesting locking the Styles on your templates – otherwise you might end up with users creating new Styles which aren’t defined in RCA.css, which is pretty painful if you’re then removing the css styles during conversion .

As a side note, what about inline changes to the format of text – what if I change the format of something without creating a new style? Well, those formats are stored inline in the converted page. If, for example, you made some ‘Normal’ Style text red, you’d get the code…

<span style="color:#FF0000">Normal Style + Red</span>

… in your page. Note that this can’t be overridden by style sheets – and doesn’t seem to be removed by either of the Remove or Store CSS options mentioned above. Best to avoid allowing this (returning us to locking down your template again!)

Now, I said I’d return to the question of why two styles for each Style. Well, the short answer is I’m not sure – but it does seem that in Word when you set up a style it applies both to a paragraph (e.g. paragraph spacing), and to a bit of text (e.g. font/colour, etc.). During conversion it appears that to account for this, two styles are required. The converted document’s HTML looks like …

<p class=Normal-P style="margin-top:3pt;margin-bottom:0pt;direction:ltr;unicode-bidi:normal">

<span class=Normal-H><span class="minorAnsiTheme Normal-H">Normal Style</span></span>

</p>

…so that might give you some idea. (The text in this paragraph is actually the phrase ‘Normal Style’, and the style applied to it is ‘Normal’).

Final note – and this really caught me out – if you convert a document to a page, then you adjust the document conversion settings and you want to reconvert that page, delete and recreate the page. Updating the page does not seem to change the page, perhaps ‘cos you’ve not updated the document itself.

What about using both?

Well, that’s tricky. The structure of the HTML and the styles are different, so you can’t just apply the same styles as is in the RCA.css file. In principle you can us both in your authoring, but you probably do need to have different definitions for the ‘Heading 1’ style in your Content Editor, and ‘Heading 1’ in your RCA.css file. I’ll blog more about this shortly, but right now I’m tired!

Modify the RichHTMLField control on your page layouts

Page Layouts, Breadcrumbs, and the space above the main content area of a page.

Previously, I’ve blogged about some of my investigations into how breadcrumbs work in SharePoint – and how sometimes they’re shown in the ‘Page Title Area’, and sometimes they’re put into the ‘Main Content Area’.

One of our customers was building a page layout, and wanted the breadcrumbs inside the Main content area. They put the following content controls into the page layout file:

<%-- This content tag blanks the 'title' placeholder, which is above the white 'main content area' of a page --%>
<asp:Content ContentPlaceHolderID="PlaceHolderPageTitleInTitleArea" runat="server" />

<%-- This content tag blanks the 'title breadcrumbs' placeholder, which is above the white 'main content area' of a page --%>
<asp:Content ContentPlaceHolderId="PlaceHolderTitleBreadcrumb" runat="server"/>

<%-- This is the main content for a page. This content tag is an example only.
Usually there is more formatting and web part zones, other controls, etc.--%>

<asp:Content ContentPlaceHolderID="PlaceHolderMain" runat="server">

<!-- This tag defines the breadcrumb to display. On a normal page (such as defaultlayout.aspx) it is a contained within a table -->
<asp:SiteMapPath ID="ContentMap" Runat="server" SiteMapProvider="CurrentNavSiteMapProviderNoEncode" RenderCurrentNodeAsLink="false" SkipLinkText="" NodeStyle-CssClass="ms-sitemapdirectional"/>

<!-- This tag displays the text of the page's 'Title' that is given when it is created. -->
<SharePoint:FieldValue id="PageTitle" FieldName="Title" runat="server"/>

</asp:Content>

Unfortunately, this resulted in a gap between the top of the page content area, and the bottom of the top navigation:

Page Layout Gap

So, what was missing?

Well, it turns out that another couple of content controls are relevant:

<asp:Content ContentPlaceHolderId="PlaceHolderPageImage" runat="server"><IMG src="/_layouts/images/blank.gif" width=1 height=1 alt=""></asp:Content>

<asp:Content ContentPlaceHolderId="PlaceHolderAdditionalPageHead" runat="server">
<style>
TD.ms-titleareaframe, .ms-pagetitleareaframe {
height: 10px;
}
Div.ms-titleareaframe {
height: 100%;
}
.ms-pagetitleareaframe table {
background: none;
height: 10px;
}
</style>
</asp:Content>

The first content tag blanks the ‘page icon’ placeholder, which is above and to the left the white ‘main content area’ of a page. It is set to show a 1 pixel transparent image, and it appears that this is to maintain page structure, where setting the content to nothing might allow the table cell to collapse. And I thought that 1 pixel transparent gifs were so 1992.

The second content tag reduces the space available for the ‘page title area’ through CSS. It overrides some of the styles to do this. Of course, this relies on your master page using those styles, or having that structure – so if you’re planning on creating a custom master page, you’d better think of all custom page layouts too. I’m not really convinced about that as design – it seems to me that this makes creating a new, radically different master page even harder, as the page layouts must be rebuilt too.

Page Layouts, Breadcrumbs, and the space above the main content area of a page.

Options for Branding SharePoint

Okay, so I’ve been tasked with looking at branding in SharePoint – again! What do I know about branding? I can change some colours and CSS, but that isn’t the same thing.

Anyway, I’m increasingly taken with Themes over Master Pages. You can do a lot with a theme, and one of it’s main disadvantages as far as I’m concerned (the inability to apply a theme across a hierarchy) can be overcome with extensions (though I’d prefer a Site Admin page option).

Another thing that I recently realised (and then discovered that I’ve probably read about too) is that you can ‘apply’ a theme to all subsites by setting the ‘Alternate CSS URL’ on the Site Settings > Master Page page. You can find the URL to a theme on a site that has that theme applied, and then paste it into the alternate CSS URL field, and apply to all children. Cool! And if you apply a theme to one of these children? Well, the theme will override the Alternate CSS – so your theme will apply.

All of which kind of confuses the heck outta people. You’ve got styles coming from, potentially, the CORE.CSS, alternate CSS, themes, masterpage’s CSS files, the master page itself, and the page. I think it works out as:

CSS Inheritance in SharePoint

…where the lower items win. It’s worth noting that the overriding of styles isn’t that fixed – your master page could pull in the themes, core.css, etc. in a different order if you wanted it to, but this is typically how it seems to be. Just remember that last wins.

And the best bit – generating Themes now has tools, such as SharePoint Skinner, and Serves SharePoint Theme Generator (though it’s more about just the colours).

New Master Pages are just awkward, though – so many required placeholders, CSS and structural quirks, controls generating things that they shouldn’t. I don’t think I’d go there again unless 1) it’s a WCM site or 2) I really need to change the page structure.

Options for Branding SharePoint